
Google Forms is great for quickly creating questionnaires with which you can collect data from your clients. It is easy to use, free of charge and you can easily connect it to a Google spreadsheet for further data analysis and report creation. With Goalify Professional's web content feature, you can easily attach such a form to a goal or workflow step.
1/ Creating the Google Form
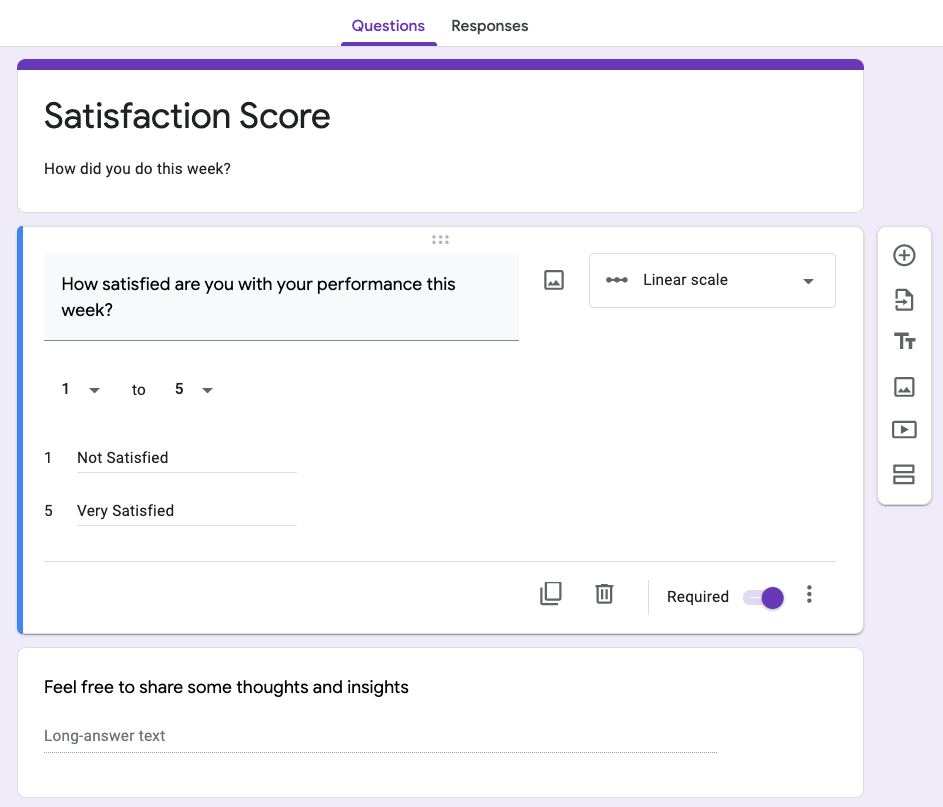
Let's start with creating a simple form asking clients to rate their satisfaction with the work they have achieved for this week. The form includes the actual rating question and an optional free-text answer to give clients an option to share their thoughts.
If we were to use this form, all answers would be anonymous because it does not collect any names or email addresses. And we don't want to bother our clients with having to input their names every week so we know who's answer we are looking at.
We need some way of identification passed to the form and which gets recorded with the answers.
Luckily with Goalify Professional's web content feature, we can pass on information about the client viewing the content to the hosting service. There are several options available, including the client's name or a unique ID that Goalify creates for each client.
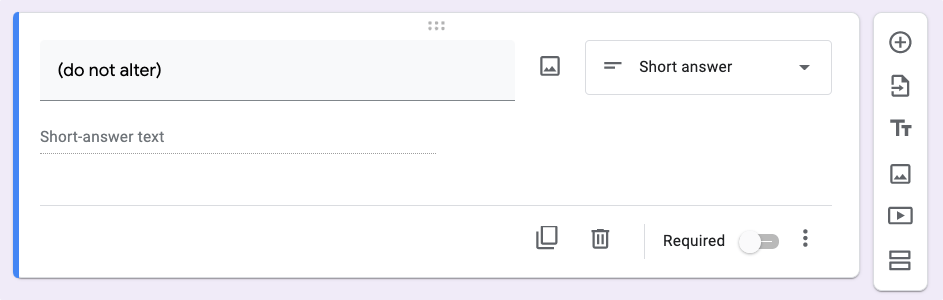
Let's go back to our Google Form and add a field that can hold the information we want to pass on. We add a new question, change it to the short-answer text option and change the name to (do not alter). Hopefully telling our clients to not worry about this field :).
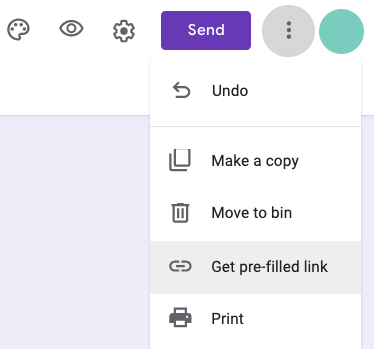
And now to the magic part. We click on the Get pre-filled link option from our form's settings menu on the top right.
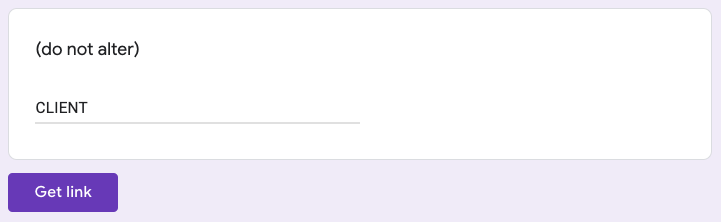
We can pre-fill any answer - but for this example, we only care about the last one. It does not matter what we enter at this point, but we suggest using an easy to recognize word. We use CLIENT.
We will explain more about this in just a moment.
We click the Get link button and the Copy link button to get the pre-filled link.
2/ Creating the template
Let's head back to Goalify Professional. We switch to the Repeating Goals section and navigate to the template screen. Next, we click the New Template button and click on the Task goal option.
We add some information about the goal and make sure that the daily goal option is selected.
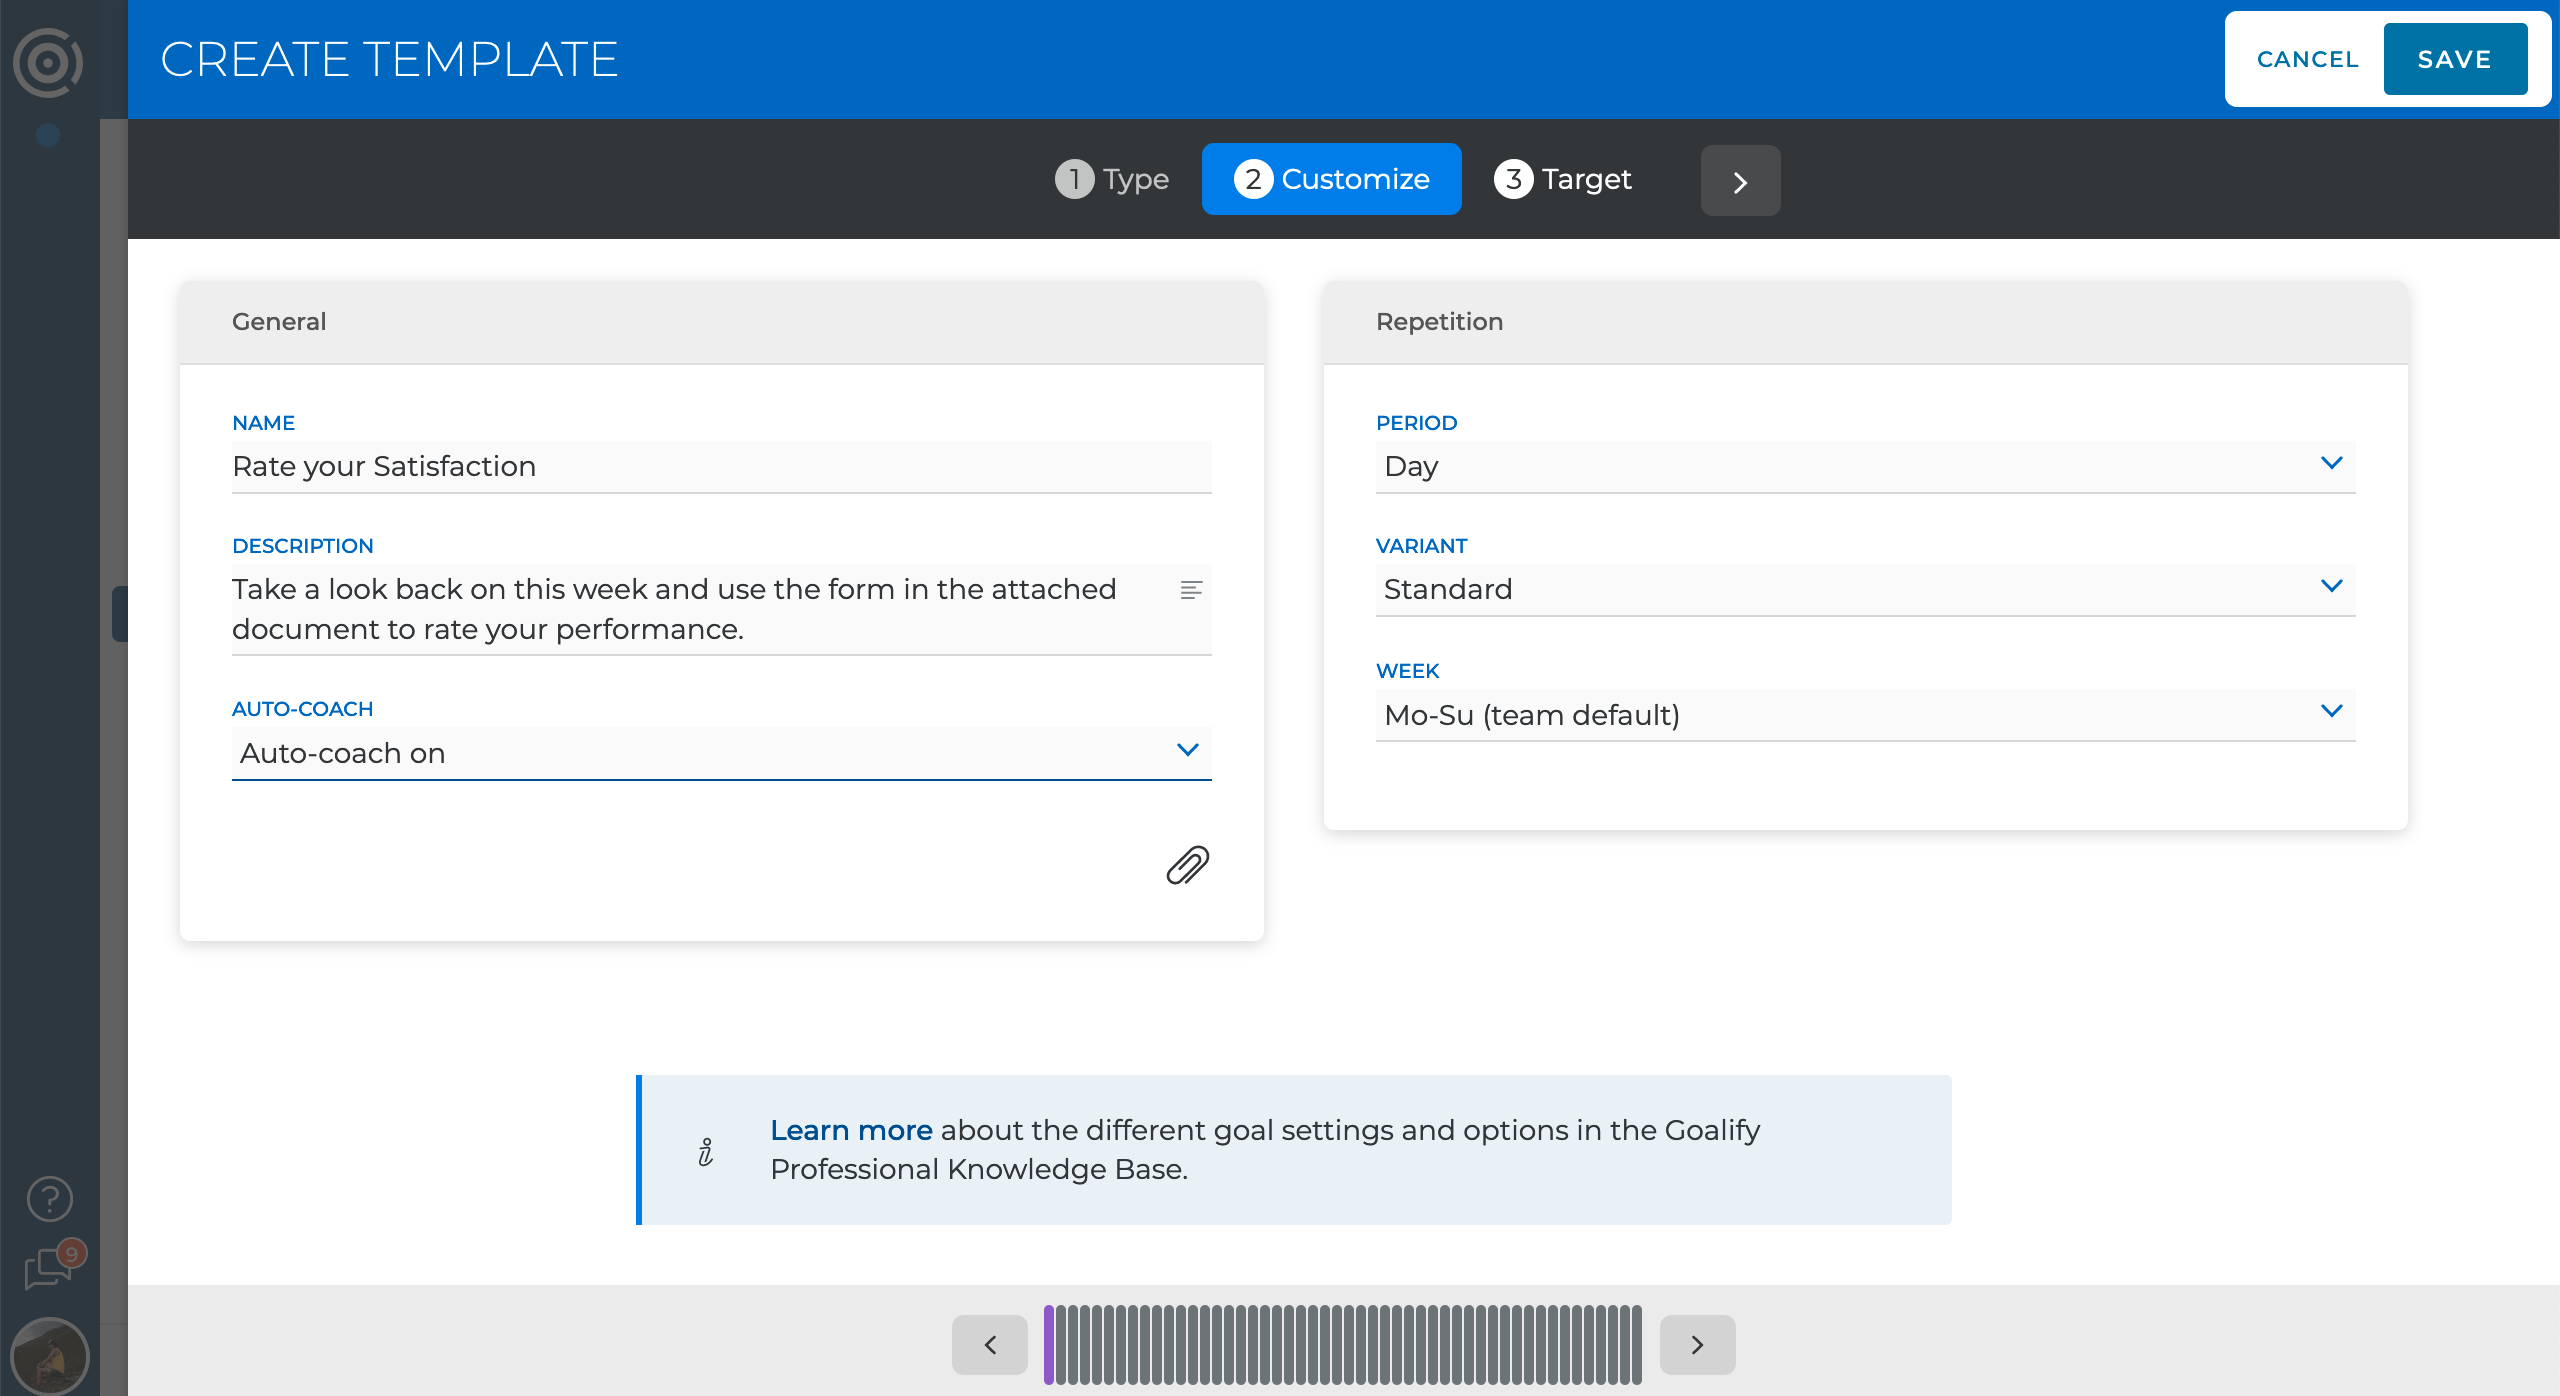
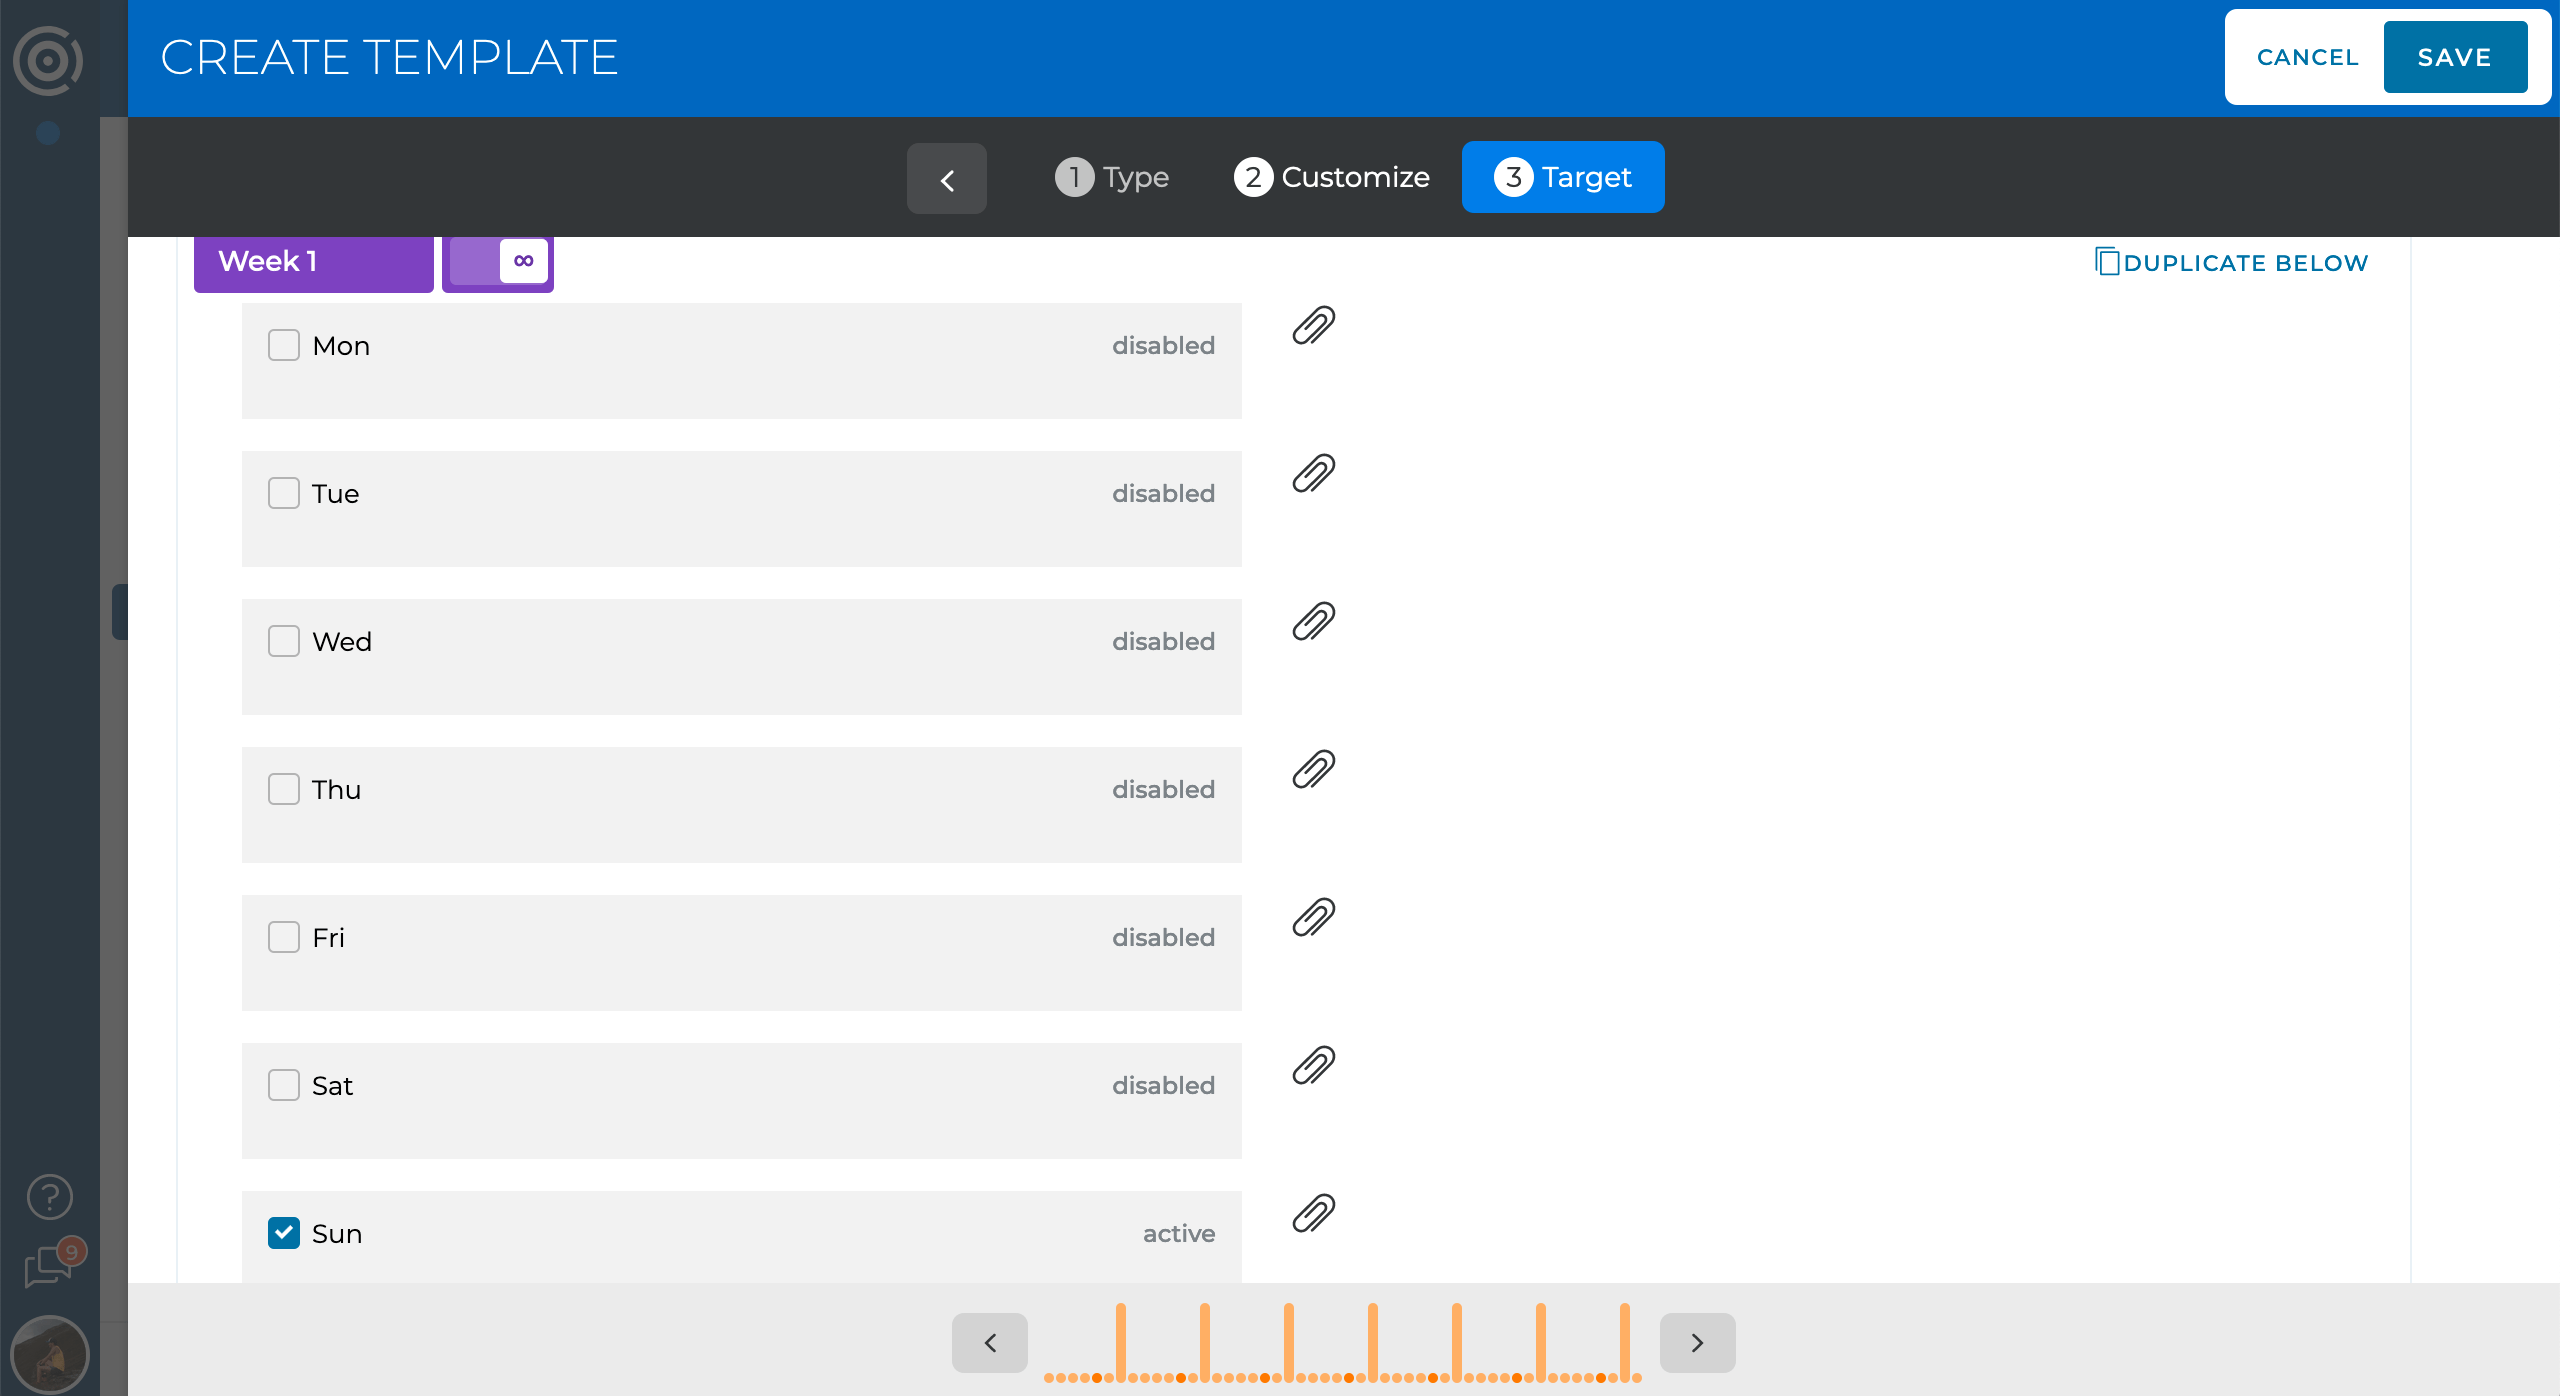
We do not want clients to rate themselves every day, so we continue to the target screen and deselect all days but Sunday. This way, even though it is a daily goal, the goal will only show up once a week - you guessed it - on Sunday.
3/ Adding the form
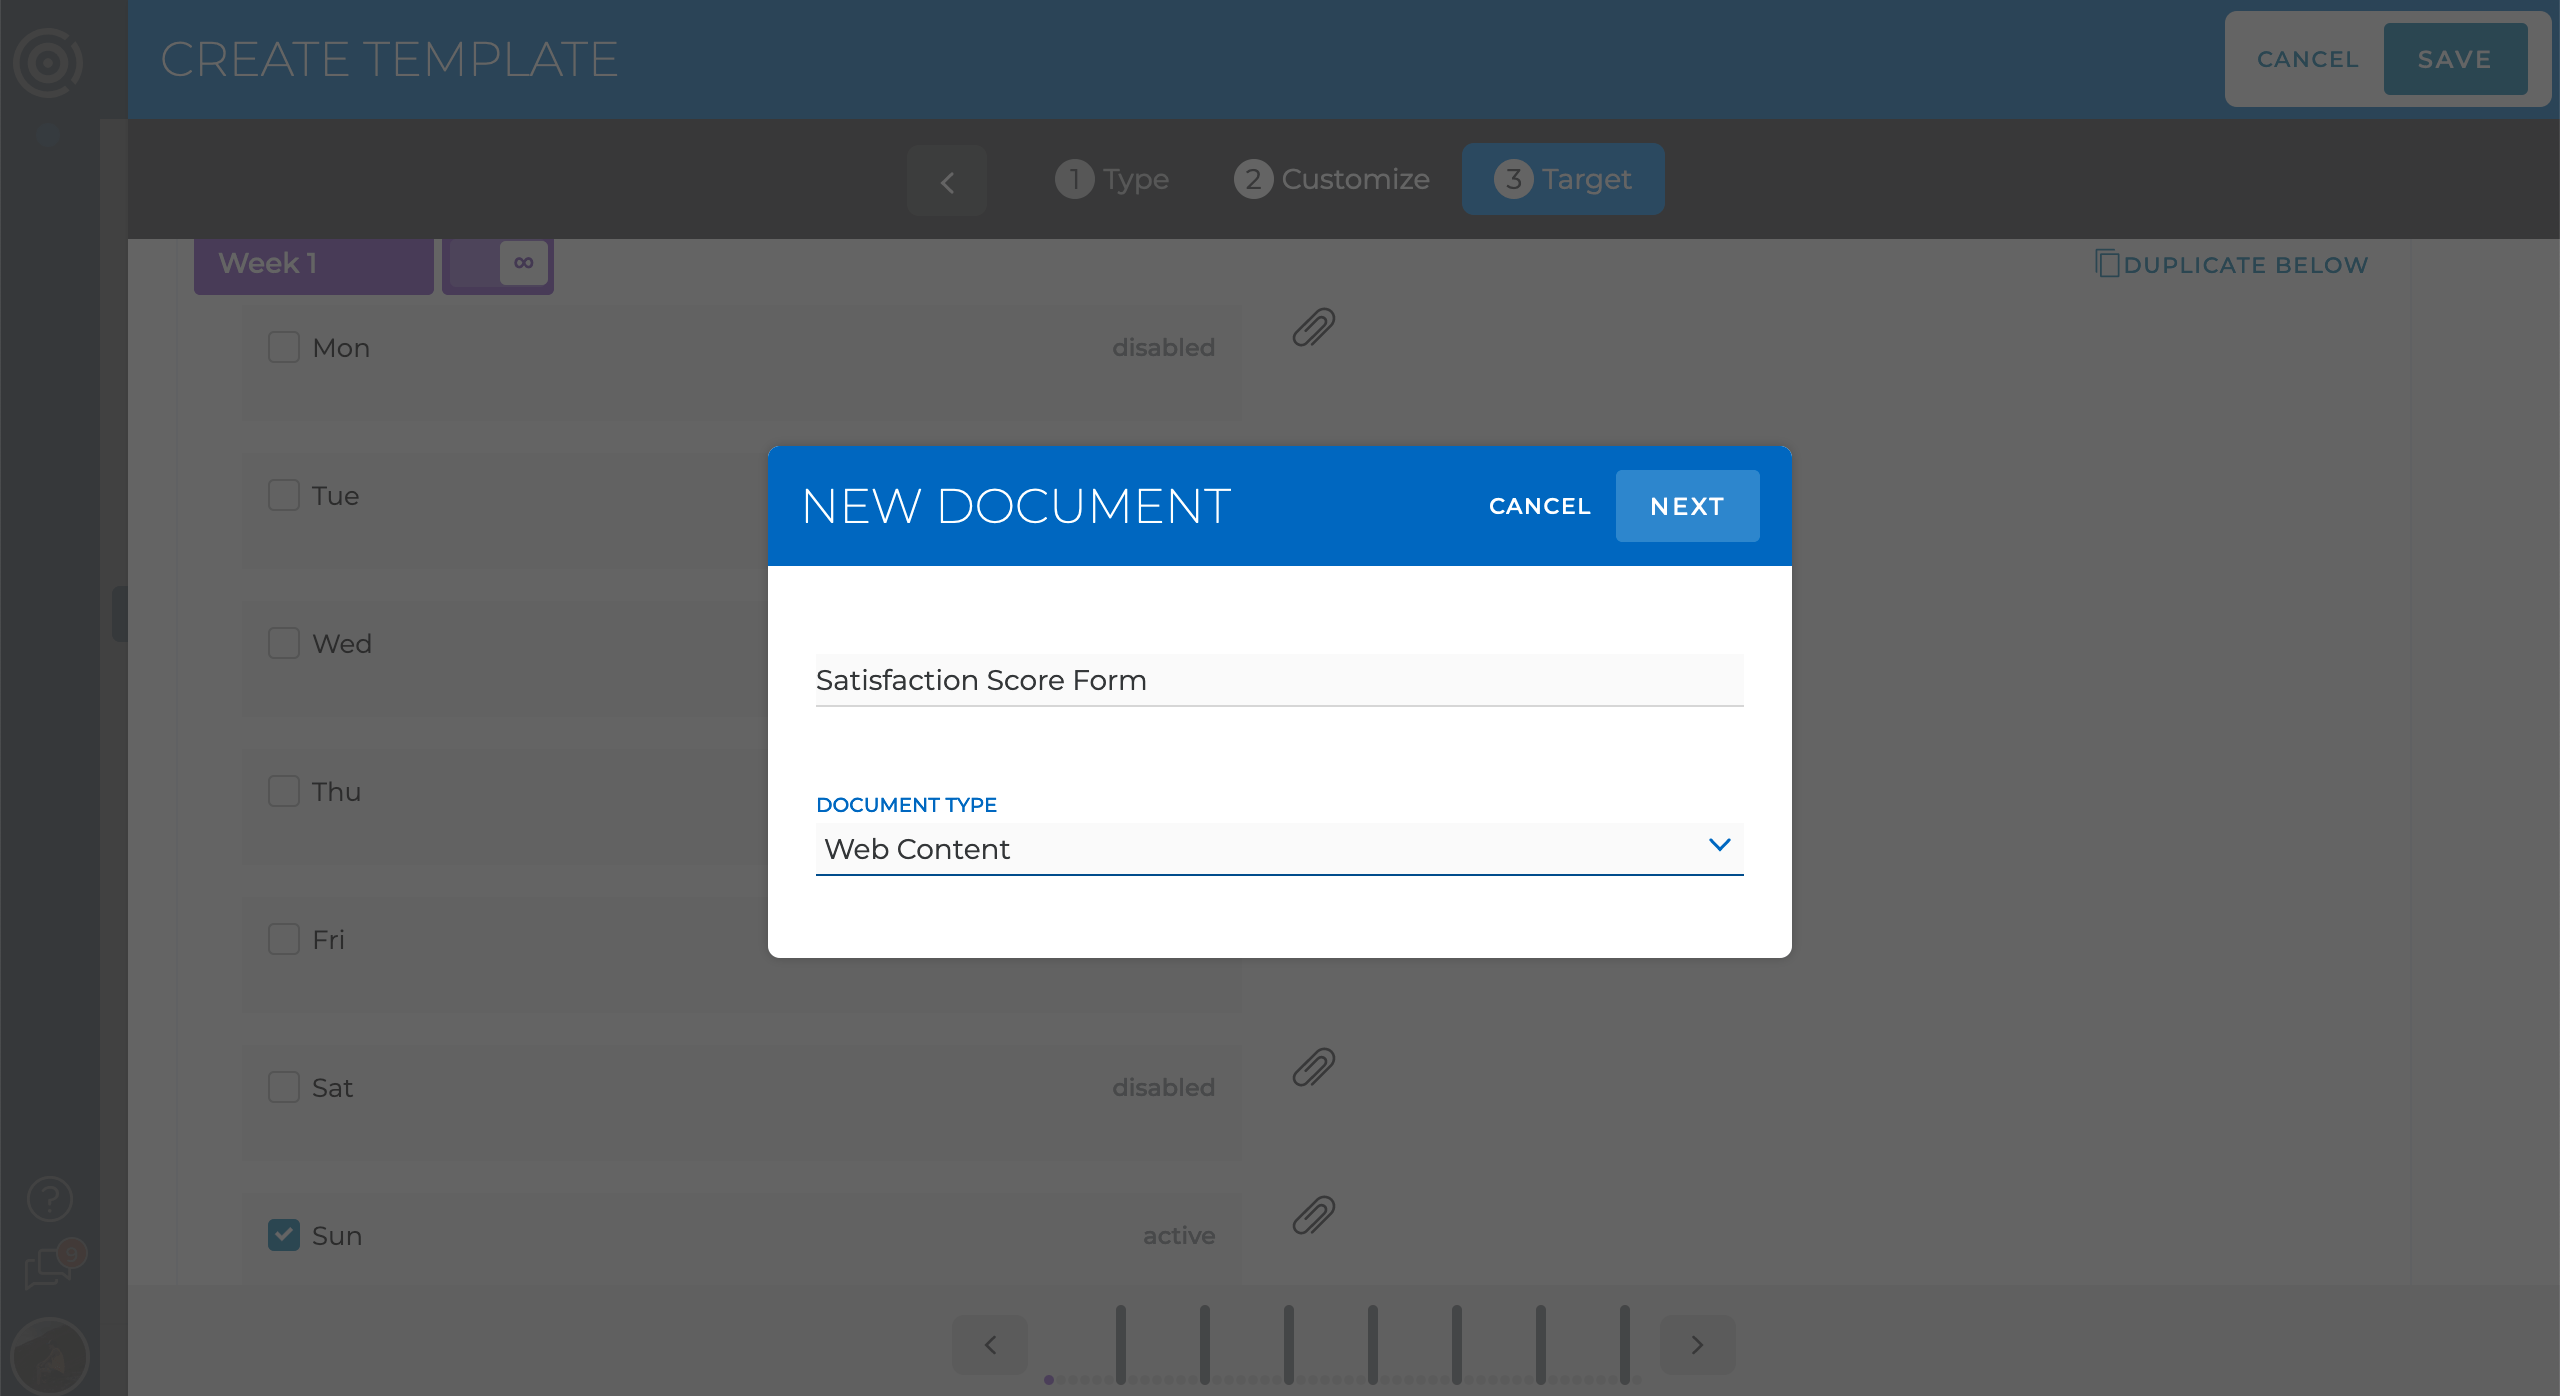
Now all that is left to do is is to add the Google Form to this goal. We click on the staple icon next to the Sunday entry, select Add document, enter a name, and select the Web Content option from the document type list.
After clicking on Next, we can paste the link to the Google Form in the URL field.
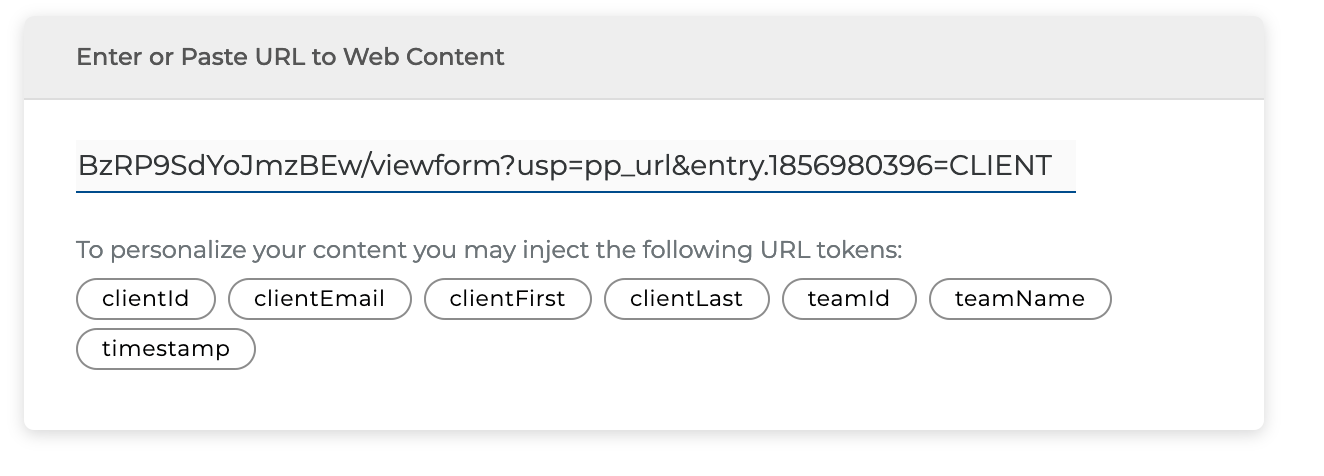
Next, we need to make one last adjustment. We have to substitute the pre-filled value with a dynamic replacement token. Goalify can recognize these tokens and will automatically replace the token with the actual information about the client.
Within the URL field, we scroll to the very end - where it says =CLIENT. We remove the CLIENT part and click on the token for clientFirst - which will add the token for the client's first name. You can recognize the added token by its curly brackets.
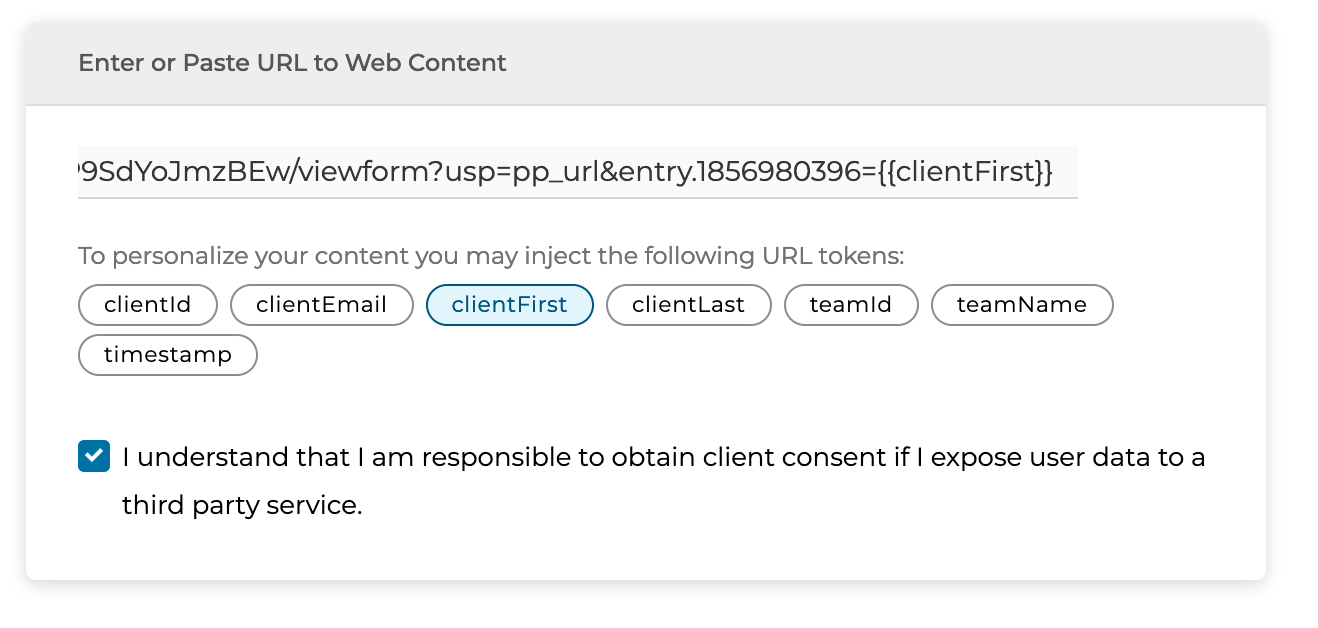
We need to confirm that we collected the necessary consent to transfer client information to another service. After checking the checkbox, we preview the form by clicking on the preview content button.
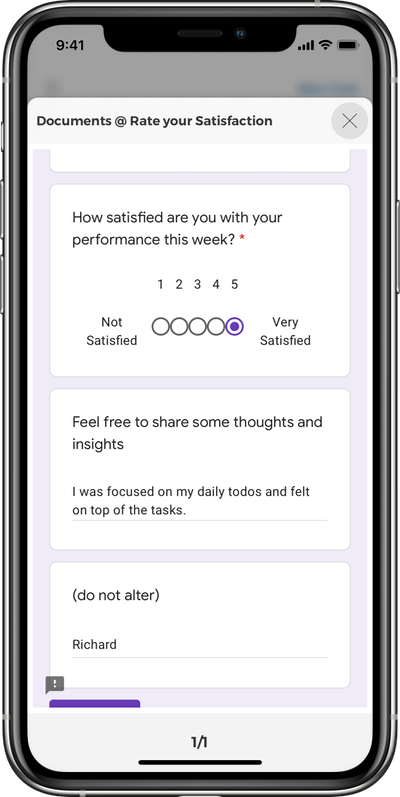
Scrolling down the form, we can see that the name question was automatically pre-filled with our name.
Working with patients and transferring identifying personal data is not an option? You could use the clientID token. It is unique to each of your clients, and only you as a coach can connect the ID back to a name.
That's all for this insight. Be on the lookout for the next one. If there's a specific topic you'd like us to touch on, let us know!
Team Goalify